Lighten Up: 7 Pro Tips for Painting Over Dark Colors
Updated Thu, Jan 22, 2026 - 5 min read
Top blog articles
Wall color is something people choose to change more often than any other part of their home. It’s an excellent way to refresh the space and give it some new image. However, even though painting can be quite an endeavor, the bigger problem is how to go about painting over dark colors.
Most people worry about this and some even choose lighter shades for their walls so they can easily repaint later. Additionally, many see this as a problem when looking to buy a new home or searching on the renting market. Before you fall into despair, have a look at these tips on painting over dark walls like a pro. So, lighten up and start planning the paint party with your friends.
1. Choose the right supplies
It obvious that this is going to take more than brush, roller and paint to get it done perfectly. Choosing right supplies is the first step in every painting process and depends on the state of your walls. You can always seek advice from the shop personnel or learn through tutorials online.
Actually, choosing the right tools is not that complicated. It’s important to choose the roller with appropriate absorbing factor and the right thickness. Base the latter according to the roughness of your walls. The thicker the roller, the better it will fill the bumpy areas.
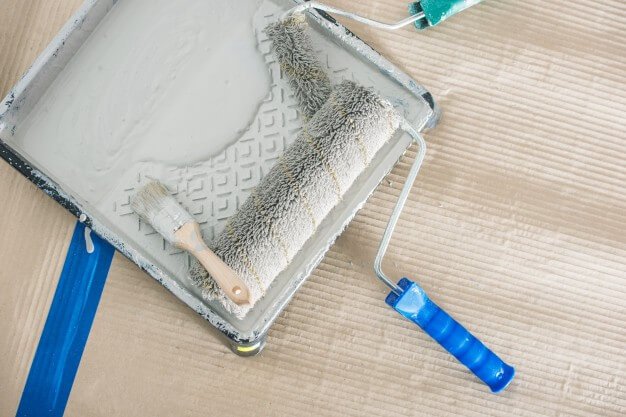
Foto de pintura creado por welcomia – www.freepik.es
Another crucial aspect is to choose the right paint. Oil-based paints are better and safer for the environment, so you can paint the walls and still be eco-friendly. More quality paint tends to be expensive, so be prepared for this so you wouldn’t change your mind and choose a less functional solution.
2. Prepare the surface
Every wall needs some preparation before painting. This is intended to fill in the holes and level the surface so the walls would accept the paint better. You can do this by sending the uneven surfaces and smoothing the edges.
It’s also important to clean the walls before starting any type of preparation. Smudges from certain materials like oil, for example, can complicate the process and prevent coloring of that spot. Additionally, buy the painter’s tape and place it on the furniture, ceiling, and edges you don’t want to be painted accidentally and intentionally. Don’t forget to place drop cloths on the floor, too so you don’t mess up the flooring or have less cleaning to do later.
3. Find the right primer
Primer is an important ingredient for the painting process since it will help you to lose the previous color more easily. Ask for the best and most effective one in the store. When turning from darker to lighter walls, choose the white primer.
Mix some paint with the primer and that first coat will make it even more effortless to paint the walls in a lighter shade. Just like with the painting materials, opt for a pricier primer since those contain more binders and pigments. That is vital if you are planning to repaint the dark walls.
4. Use thicker coats
It’s a common mistake among the amateur painters to spread the primer and paint too thinly. When it comes to covering darker walls, it’s important to cover the walls thicker than usual. If you ever hired painting companies for interior coloring, then you’ve noticed the painters moved the roller in the certain pattern. They roll in the shape of letters “M” or “W” in order for the paint to have more time to dry before another coat.
Read more: 9 Important Reasons to Hire Painting Contractors
Don’t give up easily if you notice that dark color is still visible. Apply as many coats as needed to cover it completely and be prepared to spend a certain time on this project. Keep layering the walls as thickly as you can, and soon enough your walls will turn into your desired color.
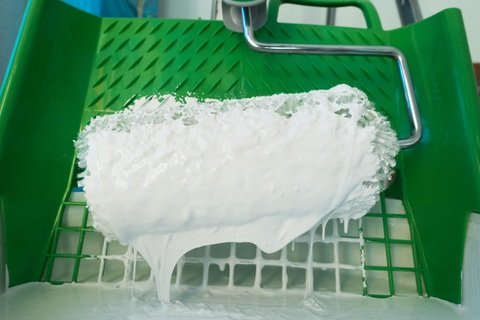
5. Don’t forget to take breaks
Taking breaks between the paint coats is something you have to plan for. The paint will need time to set in and walls should dry before you apply another coat. Some paints are absorbed fast, but just to make sure leave it longer than expected. Even though acrylic paint will dry in 15 or 30 minutes, depending on the conditions, leave it a bit longer.
Foto de abstracto creado por freepik – www.freepik.es
Breaks give you an excellent opportunity to relax and rest from the painting process, especially if it’s a more demanding one. This will help you avoid possible problems and complications with the wall paint.
Finally
Painting is not an easy job but is a gratifying one once you finish. Darker hues are not so uncommon in today’s homes, especially in those abiding by the trends. So instead of being surprised or discouraged, be prepared and practice your painting moves beforehand.
Read more: How to Paint a Room Like a Professional
Written by Cate Palmer. March 12, 2018
Cate is a designer by day and a writer by night. Her fields of expertise could be summed up in interior design, architecture, and art related topics. Her interests are, on the other hand, wide and ever-evolving. These days Cate is quite obsessed with design trends that are about to take over in 2018.
Top blog posts


See more >
Recommended
Join our newsletter
Get helpful renovation tips, insightful home maintenance articles, real estate market trends, and more.
Please enter a name
Please enter a valid e-mail