Top blog articles
Is your drywall looking damaged or worn out? Maybe all you need to do is skim coat it. Skim coating is an easy way to repair or smooth out damaged drywall that even those without too much experience with drywalling can handle. These DIY tips to skim coat drywall are easy to follow and should help you repair your drywall in no time.
Understanding skim coating
Skim coating, popularly known as a level 5 drywall finish, is the process of applying a thin coat of diluted joint compound over worn out or damaged drywall to smoothen it. While it is sometimes used as a way to repair the damage, it is also used as a makeshift measure to simply improve the appearance of the drywall.
In case it is being used only to touch up an area, a single layer may be applied, or multiple layers may be applied to cover an entire wall.
When should you skim coat your walls?
Before we define the process of skim coating, which in itself is not very complicated, it is important to recognize when it is necessary for a wall to be treated. Here are four telltale signs for you to look for that tell you that a wall needs skim coating.
- The process of removing wallpaper from drywall often leaves the surface of the wall gouged or blemished. Skim coat wall to repair those dents and blemishes,
- If you’ve repaired your drywall, skim coating it is a great way to prepare it for painting.
- Drywall takes a beating with age, like everything else. Skim coating can help you restore your beaten-down drywall to a like-new appearance without having to tear it down and replace it.
- Drywall skimming is a great way to prepare a newly installed drywall for priming and painting. The process also helps avoid texturing, since smooth walls are easier to paint than textured ones. This is why at least thin layers of joint compound are applied on new drywall.
Tools required for skim coating
- Drywall knife or taping knife
- Squeegee knife
- 4-in-1 screwdriver
- Mud pan
- Paint roller
- Safety glasses
- Roller sleeve
- Paintbrush
- Sanding pole
- Damp rag
Materials required for skim coating
- Primer
- Drywall compound
- 120 grit sandpaper
- Masking tape
The process
- The first thing you need to do is lay down a floor cover so you don’t get any primer skim coat materials on it. Then, begin prepping the wall.
- Prep the entire wall by priming it using a fast-drying, stain-sealing drywall priming. The primer will promote better adhesion of the drywall compound.
- Make sure the primer is dry before applying the drywall compound.
- Dilute the joint compound using water to the same consistency as mud that you would use for bedding tape. This will make it easier to apply the compound in thin layers on the drywall. The consistency you’re looking for is around the thickness of mayonnaise. Get it too thin, and you’ll have shrinkage.
- Use a roller brush to apply the joint compound in thin layers. Make sure the thickness of the compound you apply is no more than 1/18th of an inch.
- To ensure you get a thin, even coat, work in one small section at a time. This will allow you to smooth it out before it dries.
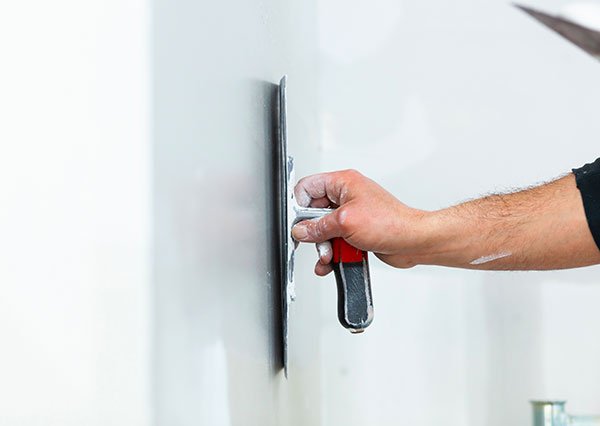
- Use a squeegee knife to smooth the joint compound. Use a mud bucket to wipe the excess mud off the knife. Start at the top and work your way down to get an even coat.
- Repeat the process until the first coat of compound is smooth. Then, trowel the second coat horizontally. If there are still imperfections after the second coat, repeat the process vertically. Keep alternating trowel directions until you’ve achieved smoothness.
- If a section starts to dry up before you’ve smoothened it out, spray some water on it to moisten it before you continue smoothing it.
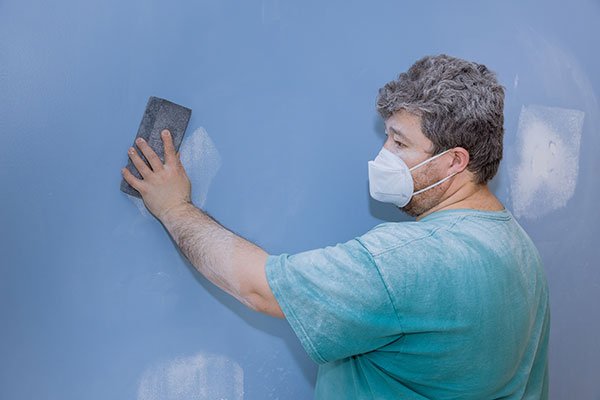
- Once the compound has dried, pole-sand the wall with the 120-grit paper. Then, wipe the wall down with a microfiber cloth to remove any dust from the surface.
Read more: How to decorate a large wall
Written by Narayan Shrouthy. January 30, 2022
Narayan is a content writer for Kukun. With experience in both content writing and editing, Narayan mixes his writing and love for reading with his passion for music. As an active musician, He aims to be a key player in Kukun's content experience.
Top blog posts


See more >
Recommended
Join our newsletter
Get helpful renovation tips, insightful home maintenance articles, real estate market trends, and more.
Please enter a name
Please enter a valid e-mail