Top blog articles
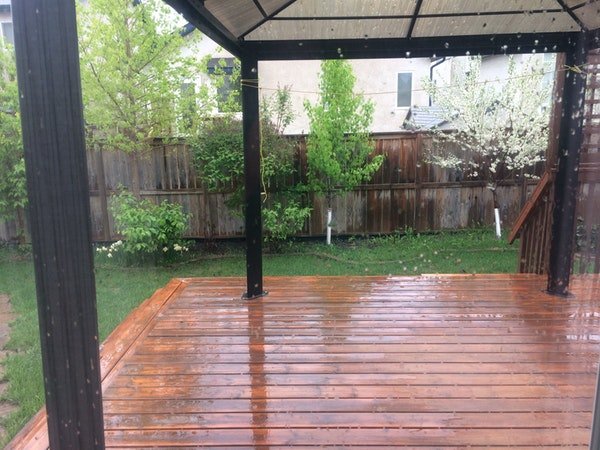
There’s something really warm and welcoming about a wooden deck. It connects with the outdoors in the most natural way (quite literally!) while adding to your house’s beauty.
However, keep in mind that your wooden deck takes a lot of abuse in terms of being in direct sunlight throughout and exposure to harsh weather elements, including rain, snow, and ice.
Did you know, the sun’s ultraviolet radiation can easily break down its wood fibers and lignin? Over time, it leads to graying and surface erosion of your outdoor living.
Also, if you live in a region with a humid climate, the excess moisture encourages surface mildew and causes stains.
Furthermore, the natural extractives present in redwood and cedar wooden decks can discolor the surface.
To cut a long story short, the bottom line is that you need to take your deck maintenance seriously!
Without proper care, it’s only a matter of time that your wooden deck becomes weathered and uninviting.
It’s always a smart decision to give your tired-looking deck a facelift before it gets damaged beyond repair. Treat your deck periodically, perhaps even once a year, and keep it protected and well-maintained.
Planning a home improvement or want to build a deck? Use our free home renovation estimator to have a fair idea of the total expenditure of your project.
To help you along the way, we have a few crucial deck maintenance tips that you must not ignore. So, let’s start.
Wooden deck maintenance tips
1. Thoroughly inspect your wood deck
The first step is to examine your deck carefully to check for any rotten boards. This is especially necessary if your deck is built with untreated wood such as redwood or cedar. These are more prone to rotting.
In case your deck was built with pressure-treated wood, it will be resistant to rot.
When it’s the former, you will have to be really thorough as most wood rot occurs in hard-to-see places.
It could be under the decking boards, on the underside of the deck stair treads, or at the ledger that’s attached to your house. You may want to crawl underneath the deck to inspect it in detail.
Also check for any loose boards, protruding nails or deck screws. Repair any damage as soon as possible. . Inspect your wooden deck for any rot too.
2. Prepare the deck for the cleaning process
Make sure your wooden deck is free of any furniture, fixture (such as a garden umbrella), or toys. Cover all fragile plants. Before beginning the cleaning process, ensure that your children are forbidden to enter the area for that duration.
3. Clean the deck
Begin the process by sweeping your deck and getting rid of any debris, dirt, and build-up. The last thing you want is to have debris clogging the spaces between the deck boards.
In case you’re dealing with difficult to-remove debris, you can blast it out with the nozzle of a garden hose or a power washer. It will also dilute any plant-killing bleach or other chemicals that may inadvertently come into contact with your flora.
4. Read the cleaning solution directions thoroughly
Before you brush or spray the cleaning solution or deck brightener onto the deck, ensure that you read all the warnings and directions carefully. Keep in mind that bleach-based products eliminate mildew, while acid-based deck cleaners cover graying and stains.
Since the bleach used to kill mildew can also leave your deck surface looking washed-out, an acid-based deck restoration product is preferred.
You must be very careful while handling such strong chemicals.
5. Begin the scrubbing
The more powerful the chemical, the less scrubbing will be required. You can scrub by hand with a basic scrub brush or a push broom. Wait for the appropriate length of time for the chemicals to do their work and then rinse the deck thoroughly.
You can even use high-powered jets for pressure washing the deck. However keep in mind that pressure washers may gouge wood or result in the grain becoming exaggerated.
6. Paint or stain the deck
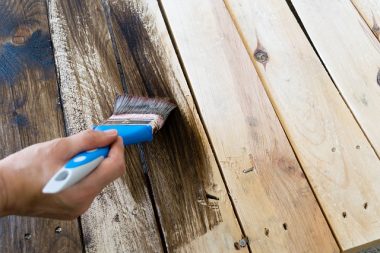
Whether to stain your deck or paint it depends on your choice. Most homeowners prefer to enhance the natural wood and its beauty with a clear, semi-transparent, or lightly stained finish. Keep in mind that the cost to stain a deck is approximately $850.
If you choose to paint your deck instead, you must use a stain-blocking oil or alkyd primer first.
We believe that the best finishes are those that your decking wood soaks in happily. You don’t want a heavily pigmented, solid stain that adds a thick surface film. It will show early signs of wear and tear, and may peel.
While choosing a wood finish, ensure the following:
- The wood finish should be water repellent or waterproof
- Just being water resistant would not suffice.
- It should offer protection from ultraviolet radiation.
- Give preference to a finish that contains a mildewcide.
Read more: What brush to use for staining wood
7. Seal the deck
The last step is to seal the deck once you leave your deck to dry completely. You may want to use tarps to protect your plants, fixtures, and outdoor appliances. You can apply the sealant (both water or oil-based) with a brush, with a paint roller, or spray it onto the deck.
Although spraying is the fastest method, it’s the hardest to control. It’s best to leave the job to a professional lest you want a colored sealant to stain surfaces that it shouldn’t.
Moreover, sealants are rough on plants and may damage them. So, you need to be extra cautious. Also, a DIY project may not yield a uniform color across the wood. A professional will ensure that quality oil-based sealants are applied evenly. A superior sealant will probably contain ultraviolet sunlight protection as well.
If you cannot think in your deck without relating it to your pool, take a look at our guide on above ground pool deck ideas that are simply stunning!
Some extra deck maintenance tips
Once you have your outdoor deck all clean and new, it’s a smart idea to keep it in good condition. Here are some deck maintenance tips for you — regardless of your decking material (whether wooden traditional decking or composite decking):
Keep an eye on your ledger
A damaged ledger can lead to the entire deck collapsing without any warning. Signs of damage may include rusted deck screws or nails.
Inspect beams, posts, and deck railings
Make sure that your beams, posts, and railings are firmly secure. Addressing a loose post or deck rail sooner rather than later can prevent expensive deck repair costs in the future.
Keep the deck clean
If your deck happens to be located near shrubs or under trees, then you’re likely going to find foliage on its surface at some point. It’s critical to remove leaves and other debris from your deck as soon as possible. Leaves, for instance, can trap moisture and allow it to seep into the wood. In turn, you’ll increase the potential for mold, mildew, and rot.
Last words
If your wooden outdoor deck shows serious wear and tear, you can’t blame it. Afterall, it’s exposed to the weather elements day in day out. It’s your job to make it look new again with some TLC.
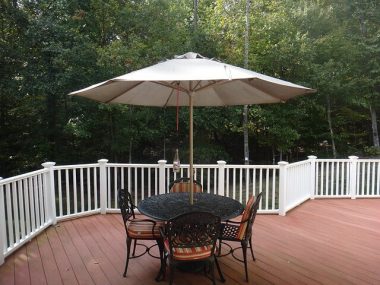
A real wood deck is a big investment. It can add immense value and visual appeal to your house. Not to forget, give you the perfect outdoor space to relax. When your deck offers you so much, it’s only right that you take the right precautions in maintaining it. Ensure an annual deck cleaning and maintenance to protect this amazing space.
Read more: Deck Design Ideas
Written by Krystle Vermes. June 19, 2015
Krystle Vermes is a professional writer, podcaster, and creator of GetSpooked.net with a background in both online and print journalism. She graduated from Suffolk University with a bachelor’s degree in print journalism.
Top blog posts


See more >
Recommended
Join our newsletter
Get helpful renovation tips, insightful home maintenance articles, real estate market trends, and more.
Please enter a name
Please enter a valid e-mail