13 Tips on How to Fix Painting Mistakes on Walls
Updated Wed, Jul 23, 2025 - 7 min read
Top blog articles
Are you an enthusiastic DIYer, who tried your hand at painting your walls, but were left with a less-than-perfect finish? Don’t worry. It happens to the best of us. Not all do-it-yourself home improvement projects turn out flawless in the first go. And, that’s why we’ll help you figure out how to fix painting mistakes on your walls.
We understand that occasional painting problems are inevitable — no matter how careful or experienced you are. If you’re unsure about your painting skills, it’s never too late to put down that paintbrush and hire a painter — leaving the hassles of painting to them.
Looking for a professional painter? Let Kukun help you hire the best.
Fortunately, you can clean up most paint mistakes without too much trouble. So, the next time you’re wondering how to fix paint drips or spill, try one of these foolproof ways to prevent goof-ups and their solutions for damage control.
Fixing painting mistakes on walls
Painting mistake 1. Uneven coverage
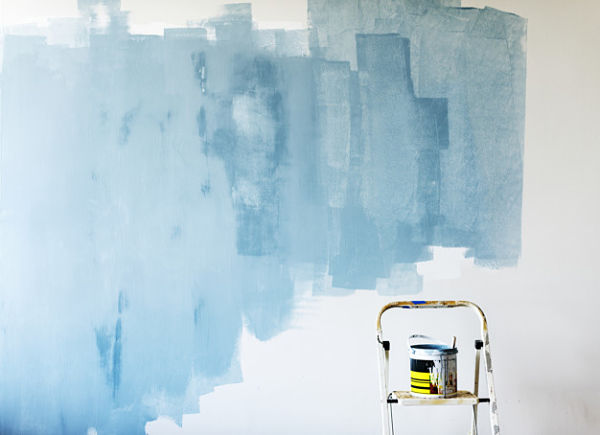
If you want a flawless paint job, you must apply the right number of coats — and at the right time. For instance, if your painted walls look patchy, it means that you didn’t apply enough paint layers. Moreover, you need to let the first coat of paint dry completely before applying the next one.
Painting mistake 2. Paint bubbles
If the topcoat of your wall paint doesn’t adhere to the undercoat properly, there’s a chance that paint bubbles or blisters may occur. The reason could be a moisture or heat problem. First of all, try to identify the underlying cause. Once the temperature problem has been addressed, you need to scrape off the bubbles or blisters with a paint scraper and sandpaper. Then, coat the wall with a primer before repainting.
Read more: Interior & exterior house painting financing
Painting mistake 3. Paint splatters on windows
Getting latex paint drips or paint splatters on your windowpane is almost inevitable. Fortunately, removing the stains is easy enough. Simply allow the paint to dry completely first. Then, scrape off the unsightly spots off with a razor blade — keeping it at an angle. As you work, keep wiping off the razor blade with a damp rag in order to remove the excess paint.
Painting mistake 4. Roller marks
If you’re working with paint rollers, you’ll have to be very careful lest the roller marks or lap marks show. They usually occur if you’ve failed to maintain a wet edge while painting. You need to restore the wall’s smooth finish. Simply sand down the uneven portions until they are smooth. Wipe the walls down to remove all traces of dust. Finally, prime and apply an even, thick coat of paint.
Your interior paint is important. Get the best estimate with us.
Keep in mind that short-napped rollers work best on plain walls, ceilings, and trim. Longer-nap roller covers are ideal for textured walls. Moreover, rollers with steel frames are sturdier to work with.
Painting mistake 5. Paint on the trim
A good way to avoid paint splatters on the trim is to keep a damp cloth close by while painting around trim work. Use the cloth to immediately wipe off any accidental skimming. But, if you’ve missed a spot and it has dried, you can still sand the paint off. Wipe off the dust and when it’s completely dry, touch up the trim area with trim paint.
Painting mistake 6. Drips and runs
If your paintbrush has excess paint, there will be drip stains on your wall. The trick is to always remove any extra paint from your brush before the application. But, how to fix dry paint that has drips? Well, you can use a paint scraper and sand the area smooth. Repaint the section carefully. Make sure it blends in with the rest of the wall color.
Read more: Remove dried paint drips from wall
Painting mistake 7. Paint spots on the ceiling
If you’ve inadvertently splashed some paint on your ceiling, immediately spray some window cleaner on a clean paintbrush and use it to wipe the paint off while the spot is still wet. If the dab of paint has already dried, you’ll need to touch up the paint with a small brush. You must be careful to feather the edges so that the paint blends in perfectly.
Painting mistake 8. Peeling paint along tape lines
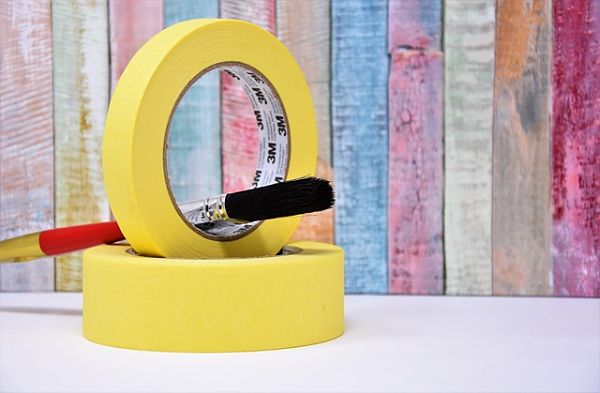
If you wait too long to remove your painter’s tape, chances are, you’ll end up pulling some paint off as you pull the tape. To fix peeling paint, you need to sand the damaged area with a sanding block. Wipe the area thoroughly with a damp cloth and carefully repaint the section.
Painting mistake 9. Carpets stains
If your paint spills on the carpet, don’t panic. Carpet cleaning is easier than you think. If the paint is still wet, you can use a wet paper towel to blot it up. Make sure you don’t rub the area. You’ll end up pushing the paint particles further into the carpet fibers. If the paint has dried, you will need to make a solution of hot water and dish detergent and pour it onto the stained area. Wait until the paint softens. Then gently scrape out the particles with a table knife.
Painting mistake 10. Patchy filler
In case your paint job requires you to fill or patch some sections of the drywall, always remember to prime the area before painting it. Or else, you will notice unattractive lighter spots. Therefore, it’s important to cover those patchy sections with a quality primer. Once it has dried completely, apply a fresh coat of paint.
Painting mistake 11. Brush marks
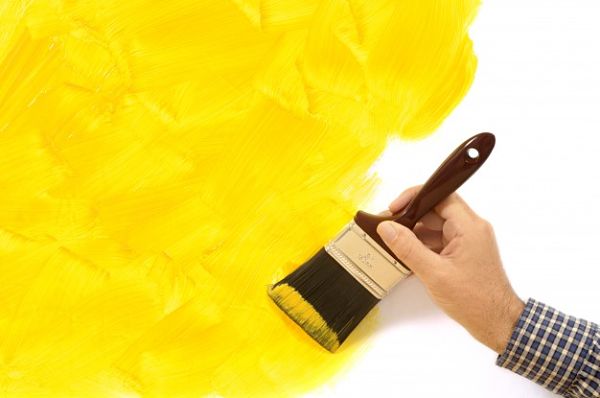
Brush marks happen. But, they give out uneven, messy results. That’s why it’s important that you’re extra careful while painting your room walls. In case the brush marks are still visible, you should sand down the area, wipe it clean, and then repaint for a flawless finish.
Read more: How to remove paint from wood floor
Painting mistake 12. Too bright a color
More often than not, the paint sample you see in the store looks and feels quite different than when it’s applied on your walls. If the color looks a little too bright, consider using a glaze to lessen its intensity. The type of color glaze you use will depend on the effect you’re trying to create. You can even get a custom glaze.
The best way to find your interior painting cost calculator, try our estimator tool!
Painting mistake 13. Lint splotches
Before you use a new roller, you must remove any lint or dust from it. Otherwise, it can transfer onto the walls and ruin your paint job by creating a splotched spot. In case such a situation happens, remember to lightly use a sanding block from the area to remove the lint from the wall. Take a damp cloth and wipe off the dust. Once it’s dry, repaint for a seamless finish.
Read more: 6 most effective steps on how to estimate a paint job
Last thoughts on how to fix painting mistakes on walls
Painting is one of the quickest and most cost-effective ways to transform your home. You can either hire a painter or take up the job yourself and paint like a pro. But, if you’ve painted your walls and are not satisfied with the results, you can still rectify a bad paint job. Always remember that the damage isn’t permanent. With these tips, you can quickly fix common painting mistakes and have beautiful walls.
Read more: What not to fix when selling a house
Written by Ramona Sinha. November 26, 2020
Ramona is the Senior Content Writer for Kukun. This experienced blogger uses simple and succinct words to decipher the complex phenomenon called life. She has written articles covering a broad range of topics, such as real estate, lending and mortgage, finance, business, taxation, home designs, home improvement projects, decor concepts, and more. An avid traveler, she’s a digital nomad at heart and an animal lover from the depth of her soul.
Top blog posts


See more >
Recommended
Join our newsletter
Get helpful renovation tips, insightful home maintenance articles, real estate market trends, and more.
Please enter a name
Please enter a valid e-mail