Real Estate Photo Editing Secrets: How to Showcase Properties Like a Pro
Updated Wed, Feb 11, 2026 - 16 min read
Top blog articles
No matter how often we say this, it won’t suffice: First impressions matter, now more than ever! When prospective buyers or renters are scrolling through property listings, the photos are often the first thing they notice, and, in most cases, these images are the deciding factor in whether they’ll book a viewing or move on to the next listing.
However, hiring a professional photographer or photo editor isn’t always an easy option, especially for smaller real estate businesses or individual homeowners. The good news is, with the right techniques and a bit of practice (or maybe a bit more), you can achieve stunning, professional-looking photos on your own. By the end of this article, you’ll have the tools and know-how to make your properties stand out online—and attract more potential buyers or renters.
Real Estate Photo Editing Made Easy: Key Adjustments
Whether you’re working with photos taken on a smartphone or a DSLR camera, knowing how to enhance them through editing can significantly impact the way potential buyers perceive a property. First, let’s have a look at some key real estate photo editing adjustments that will transform your property photos from ordinary to eye-catching:
1. Color correction
The most important step in photo editing is ensuring the colors in your images are true to life. Poor lighting conditions can often cause photos to have a yellow or blue tint, making rooms appear dull or uninviting.
- The fix? Adjust the white balance in your editing software to neutralize unwanted color tints and restore natural hues. This will make walls look crisp, floors look vibrant, and outdoor shots appear clear and inviting.
2. Exposure adjustment
Real estate photos often suffer from being either too dark or too bright, which can obscure key details and make spaces look less appealing. The goal is to balance the light so that all parts of the image are clearly visible.
- The fix? Use the exposure and brightness sliders to brighten dark images or tone down overly bright ones. You want to highlight important features—like windows, architectural details, or the texture of materials—without washing out the image.
3. Perspective and lens correction
Wide-angle lenses are commonly used in real estate photography to capture more of a room, but they often introduce distortion, causing straight lines like walls or doorways to appear curved or tilted.
- The fix? Most photo editing software includes tools for lens correction and perspective adjustment. Use these to straighten lines and correct distortions so that rooms appear as natural as they do in person.
4. HDR imaging
High Dynamic Range (HDR) is a technique that combines multiple exposures of the same scene to create a more balanced image, with well-lit areas that aren’t blown out and dark areas that retain detail.
- The fix? Many cameras have a built-in HDR mode, but if you’re editing, you can blend multiple exposures manually or use HDR real estate photo editing software. This is particularly useful for rooms with both natural light and shadowy corners, such as living rooms or kitchens.
5. Clarity and sharpness
Blurry or soft images can make a space look less defined and less appealing. Remember: You’re appealing to buyers who are scrutinizing every little detail, so a soft touch more suited to tranquil scenery doesn’t fit a professional property image. Adding clarity and sharpness to your images will ensure that every detail, from the texture of countertops to the grain in hardwood floors, stands out.
- The fix? Increase the sharpness and clarity in moderation. The goal is to make the image pop without introducing noise. Doing so will make key features like furniture, fixtures, and architectural elements appear crisp and professional.
6. Cropping and framing
The way you frame a shot can significantly affect the viewer’s perception of the space. Sometimes, the original composition might not highlight the room’s best features.
- The fix? Use cropping to remove any unnecessary distractions, like outlets, wires, or uneven edges. Make sure the room’s focal points, like large windows or unique architectural details, are centered or positioned according to the rule of thirds for a more balanced and visually appealing image.
By mastering these real estate photo editing techniques, you can elevate your property images to a professional level, making every space look as appealing as possible. Whether it’s a cozy home or a sprawling commercial property, well-edited photos are key to catching a potential buyer’s attention.
Different Types, Different Approaches
While all real estate photo editing techniques are applicable to all property images, one should note that every property is unique, and the way you edit photos should reflect the distinct features of each one.
Whether you’re showcasing a cozy residential home, a luxurious estate, or a sprawling commercial property, tailoring your editing approach ensures you highlight what makes each property special.
Here’s how to edit photos effectively based on different property types:
1. Residential properties
Residential properties are all about creating a sense of warmth and comfort. You’re talking about people’s homes, after all. Potential buyers want to imagine themselves living in the space, so your photos should feel inviting and well-lit.
- Focus on natural light: When editing, emphasize the natural light coming through windows by brightening the room without making it look artificial. Use exposure adjustments to bring out the warmth of wooden floors or highlight soft textures like carpets and curtains.
- Enhance the colors: Make sure the colors are balanced and natural. For homes with a lot of greenery outside, adjust the saturation just enough to make the outdoors pop without overpowering the interior.
- Emphasize space: Use perspective correction to ensure the space looks open and welcoming but avoid overly wide angles that distort the room’s dimensions, which can be misleading.
2. Luxury homes
For luxury homes, your goal is to capture elegance and sophistication. Buyers of high-end properties are looking for details that show off the property’s exclusivity. Luxury homes are all about being unique, one-of-a-kind, and maybe a little over the top; you’re photos should reflect the same.
- Highlight luxury materials: Pay special attention to materials like marble, granite, hardwood, and glass. Use clarity and sharpness tools to make these surfaces gleam, drawing attention to high-end finishes.
- Balance lighting: Many luxury properties have dramatic lighting, such as chandeliers, floor-to-ceiling windows, or custom fixtures. Use HDR or exposure adjustments to capture the full range of light without blowing out bright highlights or losing details in shadows.
- Create mood: Luxury homes often feature mood lighting, which can be tricky to capture. Use subtle adjustments to the shadows and highlights to preserve the ambiance while still making the room look inviting and functional.
3. Commercial properties
Commercial properties, such as office spaces, retail outlets, or industrial buildings, require a more utilitarian approach. Buyers or renters are looking for functionality, space, and professionalism.
- Highlight functionality: Focus on showing clear, open spaces that give potential buyers a sense of how the property can be used. Edit photos to ensure that the space looks clean and organized, emphasizing features like large windows, open layouts, or high ceilings.
- Enhance natural light: Many commercial properties depend on natural light to feel more spacious and welcoming. Adjust brightness and contrast to ensure that light coming through large windows or glass facades looks natural and appealing.
- Neutral tones: For commercial listings, keep the color correction neutral and professional. Ensure that colors like white walls or gray floors look sharp, clean, and true to life.
4. Outdoor spaces
Outdoor spaces, such as gardens, patios, or even the exteriors of properties, present unique challenges. Lighting can vary greatly depending on the time of day, and weather conditions can sometimes make outdoor photos look flat or dull.
- Enhance the sky: A dull, overcast sky or a simple pale blue can make outdoor photos look dreary. Use sky replacement or adjust the saturation to bring out a vibrant blue sky or go for day-to-dusk transformations and invest in the allure of a twilight sky, making the outdoor space more inviting.
- Brighten greenery: Ensure that lawns, plants, and trees appear lush and vibrant by slightly increasing the saturation while maintaining a natural look. This helps outdoor areas feel more alive and well-maintained.
- Showcase the property’s exterior: When editing photos of the property’s exterior, use lens correction to avoid distortion and emphasize architectural features like roofs, patios, or pools. Balance the exposure to ensure both the sky and the building are clearly visible.
By customizing your editing approach for each property type, you’ll be able to accentuate the most desirable features while creating a cohesive and professional presentation. Whether it’s a residential home, luxury estate, commercial building, or outdoor area, these tailored editing techniques will help you showcase properties in the best light possible.
DIY Real Estate Photo Editing: It Is Possible!
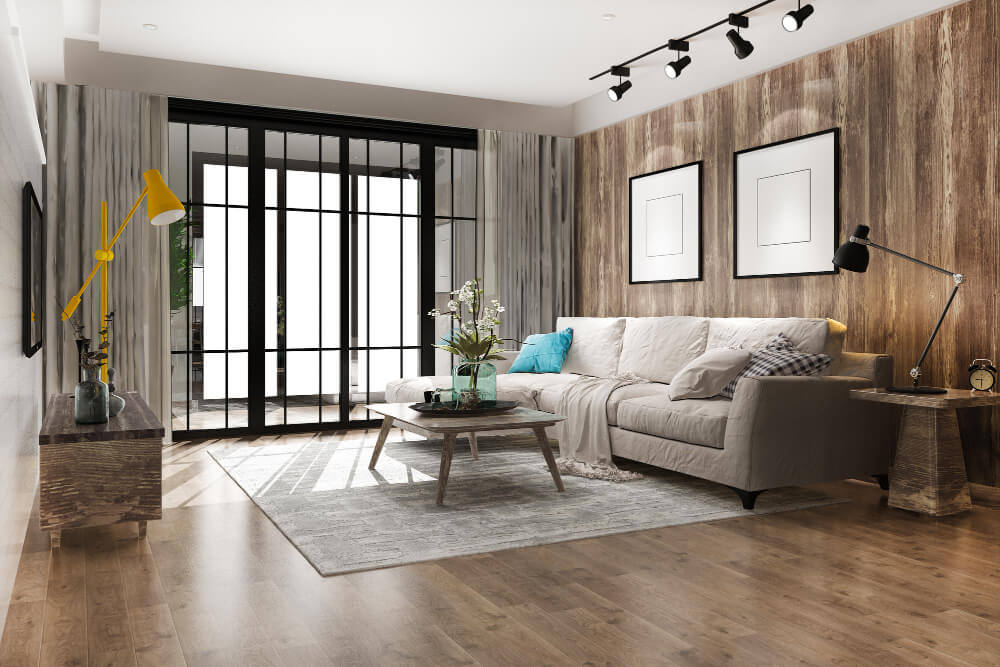
Speaking from experience, editing real estate photos like a pro doesn’t always require expensive software or a photography expert. With the right tools and a bit of practice, anyone can enhance their property photos to make them stand out. Here are a dozen plus one practical DIY tips to help you get started on real estate photo editing.
1. Use high-quality, budget-friendly editing software
If you’re just starting out, you don’t always need to climb uphill with high-end software like Adobe Photoshop. There are several user-friendly and affordable alternatives:
AI-powered photo editing
The newest generation of photo editing services: Online services powered by artificial intelligence! These are probably the best options you have since they have been developed specifically for real estate photo editing and let you take matters into your own hands without breaking a sweat!
AI platforms like AI HomeDesign give you the full range of real estate photo editing tools, such as virtual staging, day-to-dusk transformations, interior design, and so much more with diverse functionalities, while implementing all adjustments and corrections in the background.
This way, with just a few clicks and enjoying the head-spinning turnaround of artificial intelligence, you can edit your property photos however you want without depleting your resources. AI photo editing is really a thing, and it’s high time you used it to your advantage.
mobile applications
These applications such as Lightroom Mobile are great for quick edits, especially adjusting lighting, contrast, and clarity. They offer easy-to-use sliders for beginners and more advanced options for those who want to go deeper.
web-based services
Similar to mobile applications, there are many online platforms with great features for real estate photo editing. These web services like Canva offer basic photo editing features like cropping, color correction, and brightness adjustments.
2. Adjust brightness and contrast first
Lighting is everything in real estate photography. Bright photos are more appealing and make rooms feel spacious and inviting, while darker photos can seem cramped or unwelcoming.
Start by adjusting the brightness to make the photo lighter without washing out the details. Then, tweak the contrast to give more depth to the image, ensuring that bright areas don’t look overexposed and dark areas don’t appear too shadowy.
3. Crop to remove unwanted elements
Sometimes, even the best photo can have distractions like a power outlet, clutter, or an unflattering angle of furniture. Cropping is a simple way to clean up your composition. You can also use the virtual decluttering (aka item removal) service available in most of the above-mentioned AI real estate photo editing tools.
You can crop out or virtually remove anything that doesn’t contribute to the appeal of the property, focusing on the room’s main features. Use the “rule of thirds” to place key elements (like windows or furniture) in a balanced, visually appealing position.
4. Correct the perspective
Real estate photos can sometimes have distorted angles, especially when, as mentioned above, taken with a wide-angle lens. Walls may appear to tilt or curve, which can be disorienting for potential buyers.
Use the perspective correction tools in your real estate photo editing software to straighten vertical lines, such as doorways and windows. This helps create a more natural, balanced view of the space and avoids misleading the viewer. Well-developed photo editing services must have integrated such line and perspective corrections in their services.
5. Enhance colors without overdoing it
Color plays a big role in making real estate photos look professional. However, it’s important to keep colors natural. Oversaturation can make a space look artificial, cartoonish, and uninviting.
Adjust the white balance to correct any unnatural color tints (like yellow or blue hues from lighting). Then, lightly enhance the saturation to bring out natural tones—especially for greenery in outdoor shots or warm wood tones in interiors.
6. Don’t forget about file compression and format
While high-resolution images are important for showcasing properties, large file sizes or unsuitable formats can slow down your website’s loading speed, which can negatively affect user experience.
Use online tools or your editing software to compress the file size without losing too much quality. Tools like TinyPNG or JPEGmini allow you to reduce file size without sacrificing too much quality. For the web, aim for file sizes between 100KB and 300KB, ensuring fast load times without pixelation.
Also, remember to use a web-friendly file format like WEBP. Avoid using formats like BMP or TIFF, which result in unnecessarily large files. A good balance is to keep the image resolution high enough for sharpness but small enough for fast website performance.
7. Practice makes perfect
Like any skill, photo editing improves with practice. Don’t be afraid to experiment with different tools and techniques. The more you edit, the faster you’ll get at recognizing which adjustments make the biggest impact on your real estate photos.
Create a few copies of your photo and try different edits. Compare them to see which ones best showcase the property. Over time, you’ll develop an editing style that works for your listings.
As for using AI tools, you still benefit from testing out different services and real estate photo editing tools. However, since AI-based services are fully automated and produce results based on their algorithm, your focus as the user won’t be on each photo’s quality, but on finding the best AI service out there.
8. Ensure consistent image dimensions
Consistency in image dimensions creates a professional and polished appearance across your listings, websites, or social media platforms.
Set a standard image size for your real estate photos, typically 1920×1080 pixels for web use or 1024×768 pixels for MLS listings. This helps ensure that images are uniform in appearance and fit seamlessly within your website or platform’s layout.
9. Leverage file names and alt text for SEO
Properly naming your image files not only helps with organization but also boosts your SEO (Search Engine Optimization), making your listings easier to find on search engines.
Instead of generic names like “IMG_1234,” use descriptive file names such as “modern-luxury-apartment-kitchen.jpg” or “downtown-office-space-exterior.jpg.” This makes it easier for search engines to understand the content of your images and improves your visibility online.
Similarly, Alt text (alternative text) is a small but powerful SEO component that not only improves accessibility for visually impaired users but also helps search engines index your images correctly.
Write concise, descriptive alt text for each image that accurately reflects what’s shown. For example, “spacious living room with hardwood floors and large windows” works much better than “living room.” This improves search rankings and user experience.
10. Curate a balanced selection of photos
Too many photos can overwhelm viewers, while too few might leave out critical details. It’s essential to strike a balance by selecting the most impactful images that tell a complete story of the property.
Select 10-15 high-quality images for each listing, covering key areas such as the exterior, living spaces, kitchen, bedrooms, bathrooms, and any unique features like a pool or home office. Start with a wide-angle shot of the entire room, then move to detail shots to provide a more intimate view.
11. Use a consistent order for images
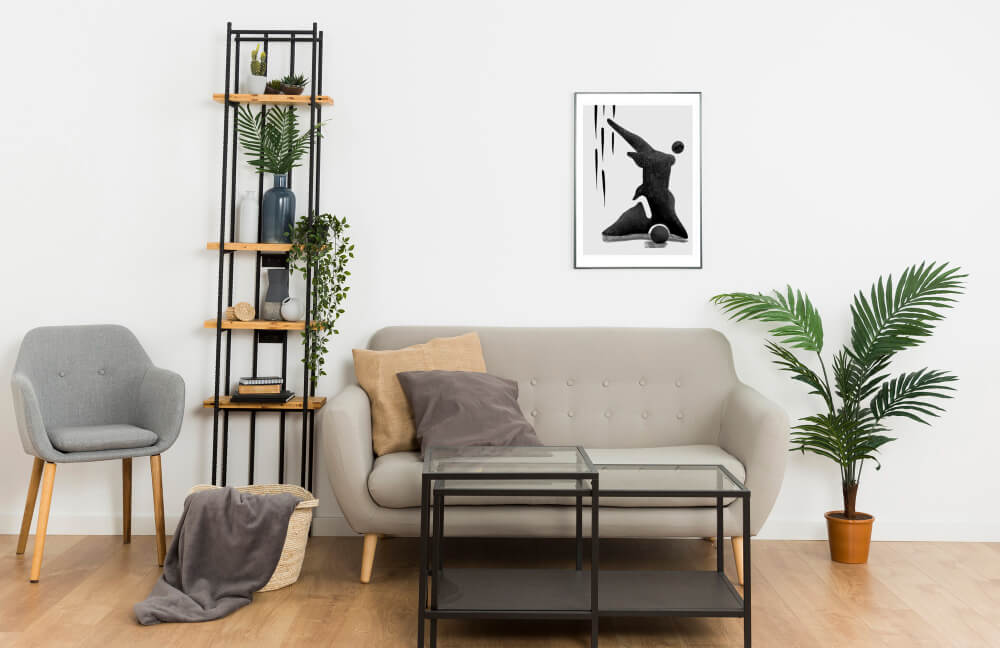
You might think of this tip as borderline OCD, but it’s subtly yet highly important! The order in which you display photos can influence how viewers experience the property. A logical flow creates a better sense of the layout and makes it easier for potential buyers to imagine themselves in the space.
Start with an exterior shot to give an initial impression of the property. Then, move through the interior spaces, starting with the living room, followed by the kitchen, bedrooms, and bathrooms. End with any special features or outdoor spaces like patios or gardens.
12. Optimize for mobile viewing
Cell phones are becoming more advanced with each passing day, allowing everyone to do everything by simply looking at their palms. With many buyers today browsing listings on their phones, ensuring your images look great on mobile devices is essential for capturing their attention.
Check how your images appear on mobile by previewing your listing on different devices. Ensure that the images load quickly and maintain their quality, even when scaled down for smaller screens. Many real estate photo editing platforms will resize images for mobile, but it’s good to review them to make sure they still look sharp and clear.
13. Engage viewers with captivating captions
You’ve allured buyers with those captivating images. Now’s the time to appeal to their more rational side with sufficient, well-written captions. A picture may be worth a thousand words, but a good caption will definitely add more value. Captions help potential buyers understand what they’re looking at and highlight key features of the property.
Write clear, engaging captions that draw attention to important elements in the photo. For example, “Expansive backyard with a custom pool and outdoor kitchen, perfect for memorable outdoor evenings” gives viewers rational context and adds emotional appeal to the visual.
Easy Editing for the Win!
Mastering real estate photo editing is less about having the most expensive tools and more about understanding how to bring out the best in a property. Whether you’re using AI-powered platforms, budget-friendly apps, or even your phone, with a thoughtful approach and some practice, you can turn ordinary property images into showstoppers.
In the end, it’s not just about selling a house—it’s about creating a visual story that captivates potential buyers and lets them imagine their future in that space. With every edit, you’re not just enhancing a photo, you’re enhancing an experience.


