How to repair rotted deck joist: A beginner’s guide
Updated Mon, Nov 18, 2024 - 6 min read
Top blog articles
If your wood deck and its foundation are showing signs of rotting, or the joist has lost significant strength, you need to repair the rotted deck joist at the earliest. If the situation gets worse, you might need to replace the deck joists altogether, which can be difficult, expensive, and time-consuming. Maintaining a beautiful and durable wood deck means addressing potential issues early. A well-constructed deck made with pressure-treated wood can last around 20 years, but moisture and rot can shorten its lifespan. In this article, we’ll cover why deck joists rot, tips for preventing damage, and steps to repair rotted deck boards and damaged joists.
Why do deck joists rot in the first place?
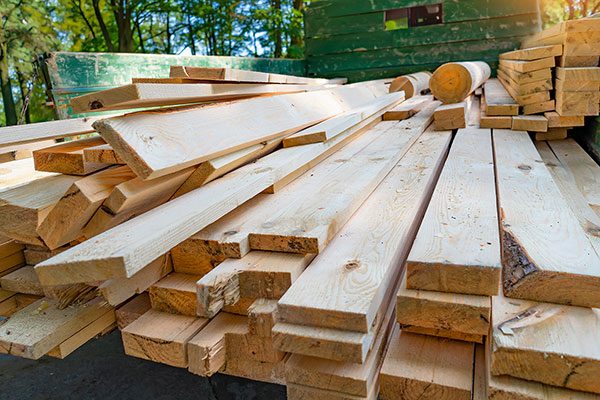
Any wooden structure that regularly gets wet may rot over time. But if you have the best pressure-treated wood, you may be able to avoid having to repair deck joist rot for a longer time.
If you’re building a new deck, always buy treated lumber, with the highest amount of copper preservatives – one that’s right for direct ground contact or burial. Also, ensure that your deck’s drainage system is properly installed below the joists.
A faulty under-deck drainage system may trap moisture – creating exceptionally high humidity. It may over time collect debris and lead to decay.
The high temperatures of the summer months further accelerate the rotting. Another reason for rotted deck joists is the painting of the exposed joists by homeowners. This can cause further damage. As the top layer of wood gets wet, there’s no way to release the moisture from within.
How to prevent deck joist rot?
- Deck joist rot prevention is so much easier if you purchase the best pressure treated lumber – rated for direct ground contact or burial.
- Also, make sure to install deck joist tape on top of the deck screws before applying the decking. This is to prevent the fasteners from adding to the dry rot. In the absence of tape, the decking fasteners create micro-cracks in the deck joists which allow water to seep under the decking – causing the lumber to swell.
- If you can’t put joist tape, try your best to check your deck regularly for any accumulated debris. You can use a hard brush to remove the particles and clean the wood.
- Avoid sealing or painting the underside of deck joists, as this can trap moisture.
- The underside of deck joists shouldn’t be sealed or painted as it can trap moisture which will cause rot.
- Install an under-deck drainage system to protect the joists and beams from moisture penetration. Also, it helps hold the screws in place longer.
- It’s a good idea to add a waterproof material to the underside of the joists.
- Add ventilation to your under-deck area with strip vents to facilitate the release of hot air and help mitigate extreme temperatures. Keeping the lumber at least 18 inches away from the soil is a good way to allow air to circulate beneath a deck.
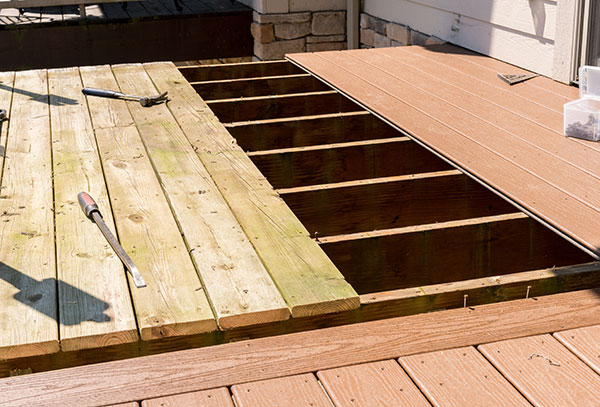
How to repair a rotted deck joist?
If you’re comfortable with DIY projects, you may be able to replace or repair rotted deck joists on your own. However, we recommend hiring a professional as it may be a complicated task for a DIYer.
Keep in mind that you’ll have to remove any joist hangers or tie-rod connectors before beginning the repair work.
Here are some of the steps repairing a rotted deck joist:
- Inspect the deck and determine the type of repair work. You can use an ice pick or long-shaft flat-head screwdriver to test for rotted areas along the entire distance of the joist.
- Remove deck boards. To expose the joists, you’ll have to remove the decking boards fasteners first. Use a pry bar to lift the damaged boards, being cautious not to damage adjacent boards. If the decking is installed with concealed fasteners, the task may be easier. But, it’s still better to leave it to an experienced decking contractor.
- Cut Out Damaged Joist Sections You need to cut away all the rotted wood with a chisel or a saw. to remove the damaged or rotted wood sections. Be sure to remove all compromised wood, as leaving rot behind will weaken the new joist.
- Drill Pilot Holes. When adding support cleats or sister joists, drill pilot holes to prevent splitting the wood. Securely fasten them with deck screws to ensure stability.
- Add Support Cleats. If the damage is isolated to a small area, you can reinforce the joist with support cleats made from treated lumber. Attach the cleats alongside the existing joist to provide added strength.
- Keep in mind that wood fillers or epoxy may replace the rotted wood but they offer no structural strength to the deck joist. And, they may not match the look of the original floor joist. Or, bond to the treated lumber. If you must use filler, always brush on copper naphthenate to the chiseled wood. It will help extend the joist’s life span.
- Reinforce the joist with sistered material. Sistering newly treated lumber onto a deck joist that has little to no wood rot is the best technique to fix deck joist rot. For example, if the top 1 inch of the joist has rotted, you can screw on a treated 2×4 inch to the existing floor joist. However, if the rot is beyond repair, you will have to replace the rotted deck joist.
- Replace Deck Boards. After reinforcing the joists, install the new board in place of the old rotted deck board. If using composite decking or pressure-treated wood, make sure to size and secure each replacement board properly. Fasten the boards with deck screws to ensure stability and longevity.
- Finishing Touches. Once repairs are complete, consider staining and sealing the deck. This step protects the wood from moisture, helping prevent future rot.
- Last thoughts
Regular maintenance and timely repairs are essential to keep your wood deck safe, strong, and visually appealing. A compromised deck not only looks unattractive but can also be a safety hazard. By understanding how to remove damaged boards, use support cleats, and properly secure decking boards with deck screws, you can extend the life of your deck and maintain its structural integrity. Taking the time to install new boards and stain and seal them ensures that your deck remains a valuable addition to your home for years to come. The goal is to have a deck that stays safe, strong, and secure.
Read more: Deck loans financing
Written by Ramona Sinha. November 16, 2022
Ramona is the Senior Content Writer for Kukun. This experienced blogger uses simple and succinct words to decipher the complex phenomenon called life. She has written articles covering a broad range of topics, such as real estate, lending and mortgage, finance, business, taxation, home designs, home improvement projects, decor concepts, and more. An avid traveler, she’s a digital nomad at heart and an animal lover from the depth of her soul.
Top blog posts


See more >
Recommended
Join our newsletter
Get helpful renovation tips, insightful home maintenance articles, real estate market trends, and more.
Please enter a name
Please enter a valid e-mail