What you should know about post renovation cleaning
Created Sun, Nov 10, 2024 - 5 min read
Top blog articles
Renovations breathe new life into your home, but they also leave behind a significant amount of dust, dirt, and debris. Whether it’s a small kitchen upgrade or a large-scale renovation project, post renovation cleaning is essential to making your newly renovated space safe, healthy, and comfortable. If you’re wondering how to clean up after a renovation and bring back the beauty of your upgraded area, we’ve got you covered with this comprehensive guide.
What is post renovation cleaning?
Post-renovation cleaning is the process of thoroughly cleaning a space after construction or renovation work has been completed. It involves removing dust, debris, leftover materials (like nails, paint splatters, or adhesives), and improving the air quality to ensure the renovated area is clean, safe, and ready for use. This step is essential to highlight the beauty of the new work, provide a healthy living environment, and make the space fully functional.
Post-renovation cleaning typically covers:
- Removing dust from all surfaces (floors, walls, ceilings, etc.)
- Cleaning windows, vents, and light fixtures
- Removing paint or adhesive residues
- Vacuuming and mopping floors
- Cleaning air ducts to improve indoor air quality
How to clean up after a renovation?
After a renovation, the space is transformed but typically left with dust, debris, and residues. Post-renovation cleaning ensures that the area is clean, safe, and presentable. Here are the step by step on how to clean up after a renovation.
Dusting and wiping down all surfaces
Start with the highest points like the ceiling fan, walls, and crown molding. Dust and dirt settle on surfaces including countertops, shelves, and even inside cabinets. Use microfiber cloths to trap dust effectively, and be sure to clean lighting fixtures, as they tend to collect a lot of particles during renovation work. Don’t forget to wipe down doors, window sills, and baseboards.
Sweep and vacuum floors
One of the most critical steps is to sweep and vacuum the floors. Renovation dust settles deep into carpets, cracks, and corners. Use a high-efficiency particulate air (HEPA) filter vacuum to capture even the finest dust particles. If you have hard floors, sweep thoroughly before vacuuming to ensure all debris is collected.
Clean windows and glass
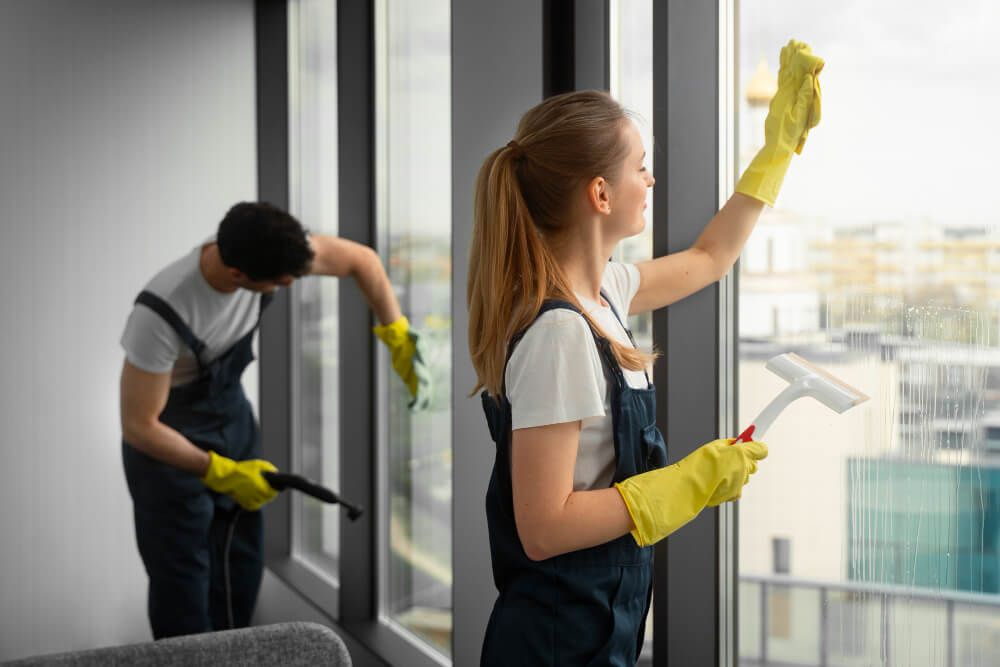
Windows are often covered in dust, fingerprints, and even paint splatters after a renovation. Use a streak-free glass cleaner for the glass itself, and be sure to clean the frames and window tracks, where dust can accumulate. This will give your renovated space a polished look.
Mop and wipe flooring and walls
Once vacuuming is complete, mop your hard floors using warm water and the appropriate cleaning solution for the type of flooring. Pay special attention to corners and edges, where dust tends to gather. For walls, use a damp cloth to wipe down any lingering dust or dirt.
Clean air vents and change air filters
Renovation dust can get into your HVAC system, so it’s essential to clean air vents and replace air filters. This ensures that the dust isn’t recirculated into the clean air of your renovated space. If needed, consider hiring post-renovation cleaning services to thoroughly clean your ducts and vents.
Polish fixtures and surfaces
Any newly installed lighting fixtures, faucets, or countertops will benefit from a final polish. Use appropriate cleaning products to ensure that no dust or dirt remains, and your fixtures are shining. This small step makes a big difference in how your renovation project is perceived.
How to get rid of post-renovation dust?
Post-renovation dust can be tricky to eliminate, but with the right approach, it can be handled effectively.
- Use a HEPA vacuum. A vacuum with a HEPA filter is a must for trapping fine dust particles, preventing them from becoming airborne.
- Wipe down all surfaces. Use microfiber cloths and warm water to wipe down all surfaces, making sure to catch dust on hard-to-reach places like light switches, window sills, and baseboards.
- Air purifiers. To remove dust from the air, use air purifiers with HEPA filters, which can capture small particles and improve indoor air quality.
- Ventilation. Keep windows open when possible to help air out the space, allowing any lingering dust to dissipate and ensuring a fresh, clean air environment.
When to do post-renovation cleaning?
The best time for post-renovation cleaning is after all construction work is completed, but before moving in any furniture. This ensures you can clean every corner of the space, particularly hard-to-reach areas like ceiling fans or lighting fixtures. If you’re dealing with a large renovation project, it might be a good idea to break the cleaning into stages, focusing first on removing large debris, then tackling dust, dirt, and finer details.
Bottom line
Post-renovation cleaning is a crucial step in finalizing any renovation project. By following a thorough cleaning process—dusting, sweeping, vacuuming, wiping down all surfaces, and cleaning air filters—you can restore your space to a clean, healthy state. Whether you choose to tackle it yourself or hire professional post renovation cleaning services, proper cleanup ensures that the beauty of your renovation shines through without the lingering dust or debris from construction work.
With the right tools and a little patience, your home will not only look brand new but also feel fresh and inviting. After all, post construction cleanup is more than just cleaning—it’s about transforming your space into the safe, comfortable environment you’ve been dreaming of.
Written by Vanessa Gallanti. November 10, 2024
Enthusiast about planning, project management, construction materials and technology, and construction. A civil engineer from Los Andes University and a content writer for Kukun.
Top blog posts


See more >
Recommended
Join our newsletter
Get helpful renovation tips, insightful home maintenance articles, real estate market trends, and more.
Please enter a name
Please enter a valid e-mail