Top blog articles
Want to enhance the look and feel of the exterior of your house? If a home remodel is not an option, giving the wood siding a fresh coat of paint might just do the trick. However, painting old wood that has been exposed to sunlight and rain can prove to be difficult. There is a lot of prep work that you will need to do before taking that paintbrush in your hand.
1. Repair and clean the surface
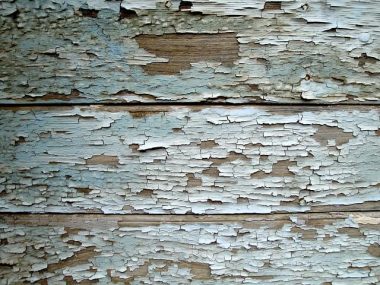
Outdoor wood needs to be repaired and cleaned thoroughly before it is ready for the paint job. Time has a strong weathering effect on wood. Simply applying a coat of new paint on weathered wood won’t do the job. Here are the steps that you need to follow in this regard.
Cover all the indoor openings such as windows and doors
Covering your windows and doors will keep the interior of the house dust-free and clean as you scrub the surface of the wood. This will also allow you to have clear access to the area that you want to paint.
How To Pick A Perfect Paint Color For A Dark Room? Let’s find out!
Clean the surface thoroughly
You may want to use some mild detergent and a scrubber brush to get rid of the accumulated dust, mold and grime. It is important to ensure that you don’t scratch the surface too hard while trying to clean it. Once you are satisfied, rinse the surface of the wood with water.
Read more: How to get rid of outdoor mold
Fill the holes
If you notice any holes on the surface, make sure to fill it with a quality wood filler. It is a good choice to go with a two-part resin system for outdoor wood. You will also need to repair areas that appear damaged.
Take a look at these 9 Important Reasons To Hire Painting Contractors
Cover the nail holes
It is common to have nail holes on old wood sidings. You will need to fill these properly so that it blends well with the surrounding area. If you find unnecessary nails on the wood, you can pull them out or drive them into the surface.
Smoothen the surface
Once the repair is done, you will need to sand the entire surface to give a smooth feel. This step will have a direct impact on the final look and feel of the wood. You may want to use sandpaper for a smooth finish.
2. Make the wood paint-ready
After you have cleaned the wood thoroughly, the surface needs to be prepared for the actual paint. This preparation involves a few critical steps that you cannot afford to miss.
Remove any existing paint
You need to remove the older layer of paint to avoid any unnecessary interference with the new coat. Use a sharp scraper for the best results. However, be careful with your strokes to avoid damaging the surface.
Sand the edges
If you find any ridge around a bare wood spot, use sandpaper to make it smooth. This will allow the wood to better grip the new coat of paint.
Take a look at these Exterior Trim Styles That Are Evergreen.
Use primer on wood knots
It is important that you apply a few coats of primer on the exposed wood knots to get them ready for the actual paint. You may also put a few coats of primer using a wire brush on small areas that look wet.
Read more: Interior & exterior house painting financing
Sand the surface thoroughly
A proper and thorough sanding will roughen up the surface, making it easier to stick paint on it.
Clean the wood surface
You can use a cloth or a brush to remove the dust that may have accumulated on the surface during sanding.
3. Prime the wood
Applying the primer is perhaps the most important step involved in outdoor wood painting. You will need to select the right primer and give it enough time to dry before you start painting the surface. Some of the things to remember involve:
Get the right primer
High quality latex-based outdoor primer is the best choice for outdoor wood painting, thanks to its high resilience against heat, moisture, and rubbing.
Read more: What type of paint to use for exterior house
Apply the primer thoroughly
Try to apply the primer when the outside temperature is between 50 °F and 90 °F for smooth and consistent drying.
Check for missed spots
Once you are done applying the primer on the surface, check for spots that you may have missed.
Give it enough time to dry
Let the base primer dry for 12 hours before applying the final coat. Once the final layer is applied, let the wood dry overnight.
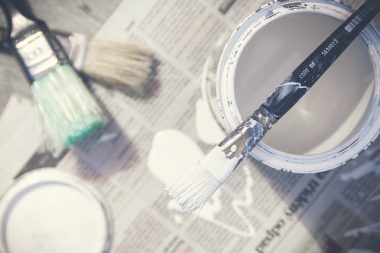
When you are sure that the surface is completely dry, it is time for some outdoor wood painting. You can simply pick the oil-based paint that you like and start coating the surface. Remember to allow the base layer of the paint to dry before applying the final coats. So, what are you waiting for? Let the paint begin!
If you are also looking to add a few outdoor shutters to your house, check this out.
Read more: Home siding maintenance tips for different siding types
Written by Kukun staff. September 3, 2019
Home remodeling at its finest. With expertise in all fields involved in nurturing your home, whether is decor, design, construction, or remodel, our team of experts is here to walk you through the process by providing amazing content on a regular basis.
Top blog posts


See more >
Recommended
Join our newsletter
Get helpful renovation tips, insightful home maintenance articles, real estate market trends, and more.
Please enter a name
Please enter a valid e-mail