Top blog articles
If your roof has suffered storm damage, high winds, or fallen debris, you may need to act fast to protect your home from additional damage. One of the quickest and most cost-effective temporary solutions is to tarp the roof. Tarping prevents bad weather from worsening the damaged area, helps avoid costly repairs, and gives you time to schedule professional roofing services. But how to tarp a roof?
In this guide, we’ll walk you systematically through how to tarp a roof safely and efficiently. Whether you’re dealing with a minor leak or extensive roof damage, you’ll learn everything you need to know—from preparation to how to secure a tarp on a roof without nails.
Tips for tarping a roof successfully
- Overlap the tarp edges if you’re using more than one tarp, and seal seams with waterproof tape.
- Check the tarp regularly. This is especially required after heavy rain or strong winds. Just make sure the tarp is still secure.
- Document the damage with photos before and after tarping. This will help when filing an insurance claim.
- Work in pairs for better efficiency and safety. One person can manage the ladder while the other works on the roof.
How to tarp a roof
A properly installed tarp can stop or reduce roof leaks by shielding the damaged area from rain, snow, and wind. However, this is a temporary fix and should be followed by professional repair as soon as possible.
What you’ll need
Before getting started, gather the following supplies:
- Heavy-duty waterproof tarp (at least 6-mil thick)
- Extension ladder
- Safety harness and roof anchors
- Work gloves
- Measuring tape
- Utility knife or scissors
- Anchor boards (2x4s)
- Screws or roofing nails (only if you don’t mind minor holes)
- Cordless drill or hammer
- Sandbags (optional, for non-penetrating methods)
The steps to securing the tarp
Ensure your safety
Before climbing onto the roof, check the weather. Never attempt roof repairs during bad weather. Wear non-slip shoes, and always use a safety harness. If your roof is too steep or slippery, call a roofing professional instead.
Inspect and measure the damaged area
Carefully assess the damaged area from both inside and outside the house. Measure the space that needs covering, and make sure your tarp extends at least 3–4 feet beyond the damage in all directions. This extra coverage helps prevent water from seeping in around the edges.
Choose the right tarp
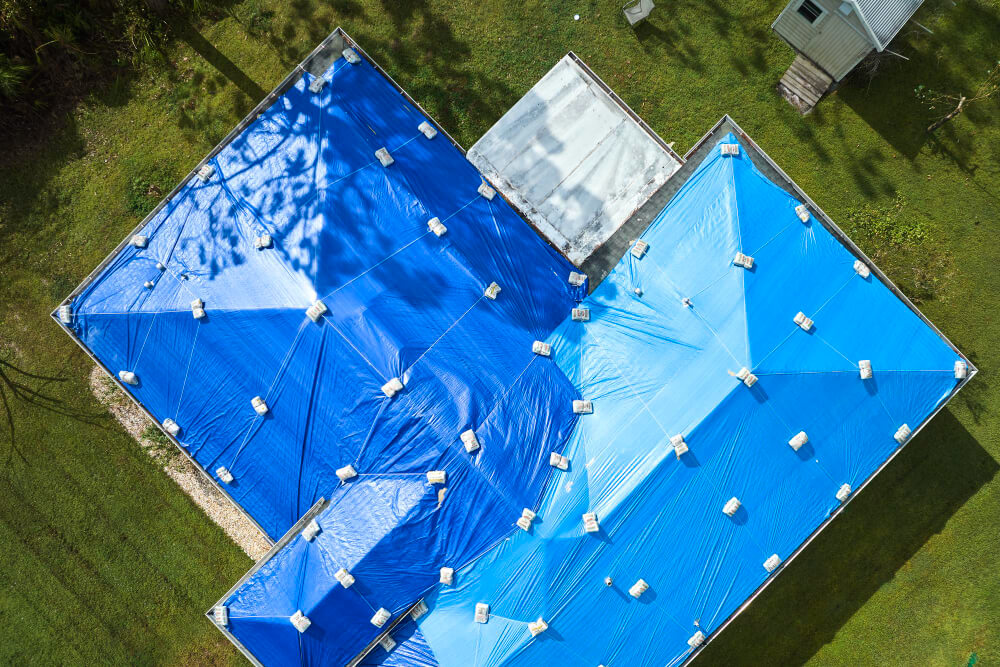
Use a heavy-duty, waterproof tarp. Ideally, it should be UV-resistant. Blue poly tarps are common, but thicker silver tarps often last longer. Make sure it’s large enough to cover the entire damaged area and reach over the roof ridge if possible.
Place the tarp over the damage
Unfold and drape the tarp over the roof. Start at the top (ridge line) and pull it downward, covering the damaged section completely. If possible, have a helper assist you in positioning the tarp evenly.
Secure the tarp using anchor boards
One of the most reliable ways to secure the tarp is with anchor boards. Wrap the tarp’s edge around a 2×4, then screw the board into the roof decking through the tarp. Repeat this step for all sides, especially the top edge, to prevent wind uplift.
To prevent more damage, avoid using screws or nails directly through the tarp unless you’re wrapping them in anchor boards. This protects the tarp from tearing and holds it firmly in place.
How to secure a tarp on a roof without nails
If you’re concerned about creating more holes in your roof, you can use sandbags, bungee cords, or heavy objects to weigh down the tarp. This method works best for flatter roofs or short-term fixes. Tie down the tarp’s grommets with rope, then anchor them under the eaves or to nearby solid structures.
How long will a tarp last on a roof?
A quality tarp, securely installed, can last up to 90 days, depending on weather conditions and the quality of the material. UV-resistant tarps may last longer, but don’t rely on them as a permanent solution.
Bottom line
Tarping your roof can be a real lifesaver when facing bad weather or waiting for insurance claims and roofers. It helps prevent further roof damage and protects your home’s interior from water intrusion. By using anchor boards or non-invasive methods such as sandbags, you can secure the tarp effectively without causing more harm to your roof. While it’s a great temporary fix, remember: tarping isn’t a substitute for proper roof repair. Schedule a professional roof inspection as soon as possible to get permanent repairs underway.
Written by Ramona Sinha. June 12, 2025
Ramona is the Senior Content Writer for Kukun. This experienced blogger uses simple and succinct words to decipher the complex phenomenon called life. She has written articles covering a broad range of topics, such as real estate, lending and mortgage, finance, business, taxation, home designs, home improvement projects, decor concepts, and more. An avid traveler, she’s a digital nomad at heart and an animal lover from the depth of her soul.
Top blog posts


See more >
Recommended
Join our newsletter
Get helpful renovation tips, insightful home maintenance articles, real estate market trends, and more.
Please enter a name
Please enter a valid e-mail