Top blog articles
Knowing how to be handy around the house is always a good thing. But while some home improvement plans may be easier than others, electrical jobs are always a little scary to handle. Let’s be honest, no one wants to get even mildly electrocuted, and that risk is real even if we’re a little careless while handling electrical repairs and replacements. However, here’s how you can safely handle minor jobs, such as basic electrical wiring for adding an extra electrical outlet to your home.
Adding an electrical outlet
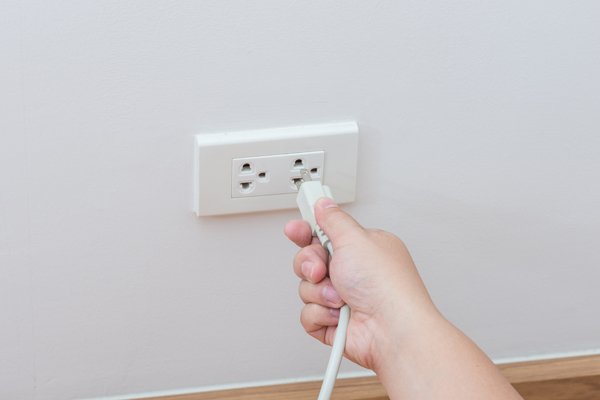
A lot of us shy away from handling even minor electrical repairs because we think it involves cutting into walls and pouring over wiring diagrams that we may not understand much of. However, you could add an electrical outlet to your home without having to do any of that, just as long as there’s an outlet on the other side of the wall. This way, you can add an extra outlet and draw power from the existing one. Let’s take you through the process.
Materials and tools needed
- An electrical cable
- An outlet receptacle
- Wire connectors
- Drywall mountable electrical remodeling box
- Multi-screwdriver
- Drywall saw
- A voltage tester
- A wire cutter
- Needle-nose pliers
Safety measures
Follow these safety measures even before you begin the project to make sure you remain accident-free.
- Turn off the power to the circuit before you begin working. To do this, switch off the breaker at the main service panel or remove the fuse.
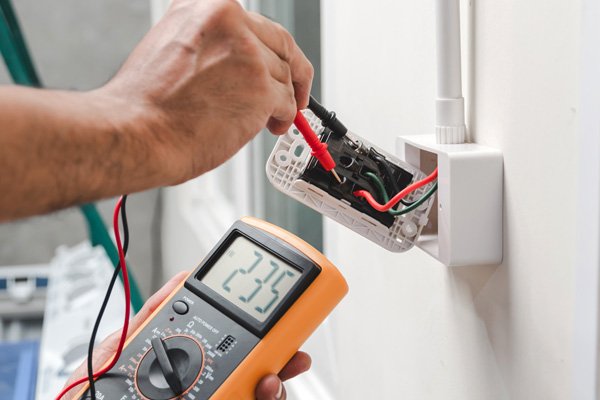
- Use a voltage tester to make sure the mains are off before you touch any terminals or bare wires on an outlet.
- If you notice that your home has fabric insulated wiring, call an electrician for advice before you proceed. This is because these kinds of outlets don’t have a ground wire, and instead of a white neutral wire, you are likely to find two black wires. This makes it hard for novices to differentiate between which one is neutral and which is hot.
- If you see that the wiring is dull gray, it means you have aluminum wiring. In this case, you ought to call a professional electrician to handle the job.
The process
Shutting down the power
- Select the electrical outlet that you intend to use as a power source and shut down the power to it by switching off the correct circuit breaker at the main electrical panel.
- Once you’ve disconnected power to the outlet, use an electronic stud finder and locate the studs on either side of the outlet. Your new outlet can be positioned anywhere in between these two studs.
- Next, unscrew the outlet and make sure the power has been switched off using a voltage tester.
To do this, you must have one lead touching the bare copper-colored ground wire, touch the other lead either to the white or silver-colored neutral terminals, and then the gold-colored hot terminals.
If the tester lights up at any point in time, it means the circuit is still live.
Marking space
- Trace out the dimensions of the remodeling box on the wall by holding the face of the box against the wall and using a pencil.
- Use the drywall saw to cut out the hole you marked.
Feeding the new cable
- Unscrew the electrical box on the other end of the wall using a screwdriver. Punch out one of the knockouts located at the back of the box.
- Feed a length of new cable through the hole at the back of the existing box. Make sure you feed enough cable to reach the new box plus an extra foot.
- For a 15 amp circuit, always use a 14 gauge wire.
Read more: How to test a GFCI outlet
Wiring the outlets
- You now need to connect the wires of the new cable to the existing wires. Run the new cable at least two inches inside the existing box and double it over the excess wires to hold it in place.
- Strip about 10 inches of the plastic sheathing on the new cable. This will expose white wires, copper wires, and golden wires.
- Connect the wires from the new cable onto the existing wires. Make sure you connect the neutral wires to the neutral ones (white-colored), the hot ones to the hot wires from the old cable (black colored), and the grounding wires to the older grounding wires (copper-colored).
- Make a hook using a wire coat hanger, and use it to fish for the new cable.
- Pull the cable through the opening you cut for the new box.
- Strip off about nine inches from the end of the cable and insert the cable in such a way that the sheath extends about one inch into the box. Mount the box in the wall.
- Connect the new wires into the new outlet. The neutral wire needs to be connected to the silver screw, the black hot wire to the gold-colored terminal screw, and the grounding wire to the green screw.
- Ensure you orient the hooked end of the wires in the direction you’d be tightening the screw, clockwise.
- Make sure you secure the cable sheath inside the box.
- Get an electrical inspector to check your work.
Read more: DIY tips to skim coat drywall
Written by Narayan Shrouthy. July 2, 2021
Narayan is a content writer for Kukun. With experience in both content writing and editing, Narayan mixes his writing and love for reading with his passion for music. As an active musician, He aims to be a key player in Kukun's content experience.
Top blog posts


See more >
Recommended
Join our newsletter
Get helpful renovation tips, insightful home maintenance articles, real estate market trends, and more.
Please enter a name
Please enter a valid e-mail