How to Take Photos of Real Estate: A Complete Guide for 2025
Updated Thu, Oct 30, 2025 - 11 min read
Top blog articles
Let’s start with a fundamental truth: the camera doesn’t make the photographer. Starting from this premise, taking pictures of real estate implies knowing how to frame, understanding the best angles of the property, recognizing the right time to capture them, and taking the time to look for references. You don’t need expensive machinery to achieve professional results, but a quality camera, whether it’s an iPhone or a Sony, certainly helps.
Whether you’re a real estate agent looking to improve your listing photos, a contractor showcasing completed projects, or a homeowner preparing to sell, this comprehensive guide will walk you through everything you need to know about real estate photography.
Why Quality Real Estate Photography Matters
According to the National Association of REALTORS®, more than 90% of home buyers search for homes online, and 85% of buyers say photos are the most important factor in deciding which homes to view. In today’s digital-first real estate market, your property photos aren’t just helpful; they’re essential.
Professional-quality photographs can help properties sell faster and often for higher prices. They create powerful first impressions, showcase a home’s best features, and help potential buyers envision themselves living in the space.
Setting Up Your Real Estate Photography Shoot
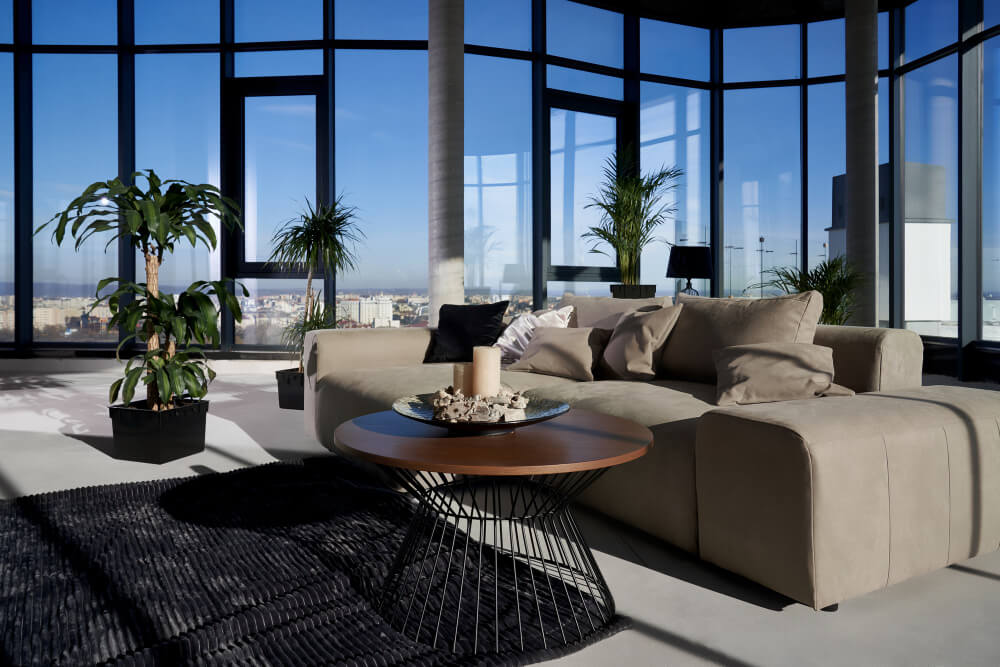
Preparing for a real estate photography shoot involves meticulous planning and attention to detail. By following these essential steps, you’ll ensure that you capture the property effectively and professionally.
Create a Comprehensive Shot List
Before you arrive at the property, develop a detailed shot list that covers all essential areas. This ensures you don’t miss any important features and helps you work efficiently on-site. Your list should typically include:
- Exterior shots (front, back, and side views)
- Entryway and foyer
- Living room from multiple angles
- Kitchen (wide shots and detail shots)
- All bedrooms
- All bathrooms
- Special features (fireplace, built-ins, outdoor spaces)
- Unique selling points specific to the property
Determine the Best Photo Order
The sequence in which you capture real estate photos creates a compelling visual narrative for potential buyers. Start with exterior shots, particularly the front of the home, to establish curb appeal and set the stage. This gives viewers an immediate sense of the property’s character.
Moving indoors, photograph in a logical flow: entrance, living areas, kitchen, dining room, bedrooms, and bathrooms. This strategic approach ensures that each room’s unique attributes are effectively highlighted and helps maintain consistency throughout your shoot.
Choosing the Right Equipment for Real Estate Photography
Camera Options
Smartphones: Many real estate professionals successfully use modern smartphones for property photography due to their convenience and portability. Today’s smartphones feature high-quality cameras capable of capturing detailed images, and numerous photography apps can enhance photos directly on the device.
DSLR Cameras: Digital Single-Lens Reflex cameras are favored by those who prioritize image quality and versatility. DSLRs offer interchangeable lenses, manual controls, and advanced features such as high-resolution sensors and image stabilization. These allow you to capture professional-quality photos with greater control over composition and exposure.
Mirrorless Cameras: These have gained popularity due to their compact size, advanced features, and excellent image quality. The lightweight design and advanced autofocus capabilities make them ideal for real estate work, and like DSLRs, they support interchangeable lenses for different perspectives.
Drone Cameras: Aerial photography has become increasingly popular in real estate marketing. Drones equipped with high-resolution cameras and stabilized gimbals can capture unique perspectives and showcase the property’s location and surroundings effectively.
Essential Lenses
A wide-angle lens (typically 16-35mm for full-frame cameras) is crucial for real estate photography. It allows you to capture expansive interior spaces and convey a sense of scale to viewers. The versatility of wide-angle lenses enables precise control of settings, ensuring optimal image quality in various lighting conditions.
However, be cautious not to overuse extreme wide angles, as they can distort room proportions and create unrealistic expectations for buyers.
Supporting Equipment
- Tripod: Essential for sharp images and HDR photography
- External Flash: Helps balance lighting in challenging conditions
- Remote Shutter Release: Prevents camera shake for crystal-clear images
- Light Stands and Reflectors: For advanced lighting control
Best Flash Options for Real Estate Photography
The best flash for real estate photography provides ample light coverage, versatility, and adjustability for different shooting scenarios. Popular options include:
Canon Speedlite 430EX III-RT: This compact flash provides adaptability and power, offering 90-degree vertical rotation for interior photographs and 330-degree horizontal rotation for angled property photos.
Godox V850II: Easy to use with an LCD and control panel, compatible with several camera brands (Nikon, Canon, Pentax, and Olympus). Suitable for both novice and experienced photographers.
Yongnuo YN560 IV: Perfect for real estate photographers who prefer an on-camera flash. A reliable companion with simple controls and excellent value.
The best flash for you depends on your specific requirements, shooting style, and budget constraints.
Mastering Lighting Techniques
Maximize Natural Light
Natural light significantly impacts the mood and atmosphere of real estate photos. Shooting during the golden hours (early morning or late afternoon) when the sun’s light is soft and diffused can produce stunning results.
For interior shots, open windows, curtains, and blinds to let in as much natural light as possible. Position the camera to take advantage of natural light sources, illuminating interior spaces evenly and minimizing harsh shadows.
According to staging professionals at the National Association of REALTORS®, it’s best to photograph during dusk or on overcast days for balanced light throughout the space, avoiding the washed-out look from excessive sunlight.
Understanding HDR Photography
High Dynamic Range (HDR) photography is a game-changing technique for real estate photographers. It combines multiple exposures of the same scene to capture the full range of light visible to the human eye, something particularly important when photographing interiors with bright windows and dark corners.
The technique involves taking several shots at different exposures (typically 3-5 bracketed photos) and merging them together. The result is a perfectly exposed image where you can see both the room interior and the view outside the window clearly.
Professional HDR photography requires practice and the right post-processing software, such as Photomatix Pro or Adobe Lightroom, to achieve natural-looking results without the over-processed “HDR look” that can appear artificial.
Flash Photography Techniques
When natural light isn’t sufficient, strategic flash photography can make all the difference. The key is using flash to complement natural light rather than overpower it. Position flashes off-camera to avoid direct reflections and harsh shadows.
Many professional photographers use a technique called “flambient” photography, which combines flash and ambient light for beautiful, high-end results. This hybrid approach balances the strengths of each method, ensuring interior spaces are well-lit without sacrificing the natural look of window views.
Camera Settings for Real Estate Photography
- Aperture: For interior real estate photography, f/8 is usually the perfect setting to capture an entire room in crisp focus. For larger spaces or rooms requiring greater depth, adjust closer to f/11 or f/16
- Shutter Speed: In low-light conditions, slow down your shutter speed between 1/60 and 1/2 of a second for brighter pictures. Always use a tripod to prevent camera shake
- ISO: Keep your ISO below 400; closer to 100 is ideal for minimizing noise in your photos
- White Balance: Adjust according to your lighting conditions to ensure accurate colors
The Critical Role of Home Staging
Effective home staging plays a crucial role in real estate photography, enhancing the property’s presentation significantly. Staging involves strategically arranging furniture, decor, and accessories to showcase the home’s best features and create an inviting atmosphere.
According to NAR research, when a home is properly staged, it highlights the function and beauty of the property so that buyers can more easily imagine themselves living there. Staged rooms appear more spacious, organized, and visually appealing in listing photos, capturing viewers’ attention and enticing them to explore further.
Staging Tips for Better Photos
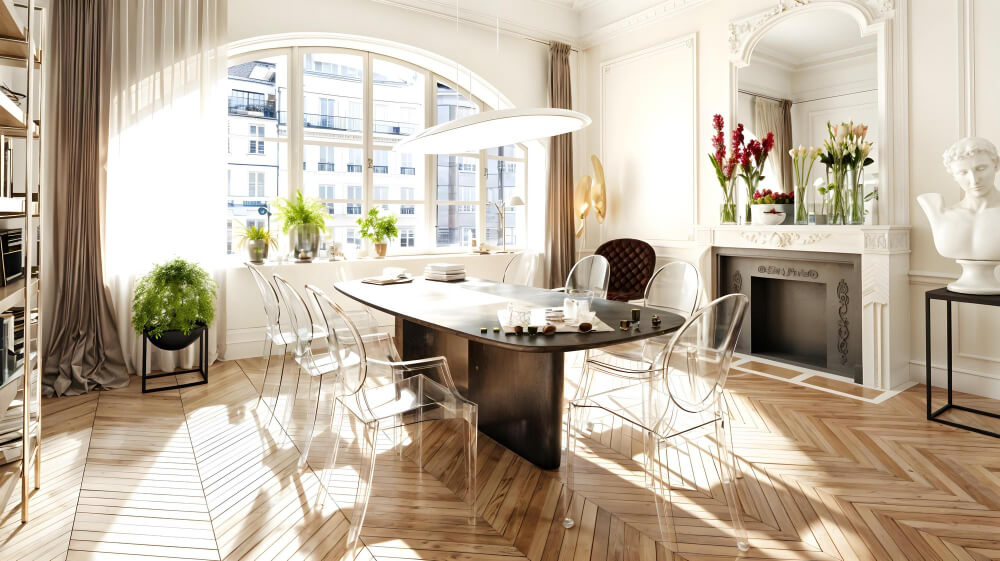
Declutter and Depersonalize: Remove personal items, family photos, and excess decorations. Create clean, neutral spaces that allow buyers to envision their own belongings in the home.
Consider the Background: Appropriately displayed art on walls or above a fireplace can add color and enhance photos. Organize bookshelves by coordinating books by color or height, and remember that less is best.
Clean Light Fixtures: Clean lamps, chandeliers, and light fixtures throughout the home. Replace yellowing lampshades and burnt-out bulbs to ensure optimal lighting.
Use Props Carefully: While the perfect accessory can enhance a room’s feel, avoid clichés like wine bottles or candles around bathtubs. Simple white orchids, greenery, or a tasteful throw are inexpensive props that add accent without overdoing it.
Avoid Common Blunders: Close toilet seat lids, turn off TVs, move vehicles from the driveway, and carefully scrutinize each room before photographing.
Post-Processing: The Final Touch
After the shoot, review your images carefully and select the best ones. Use photo editing software to enhance brightness, contrast, and color balance as needed. However, maintain authenticity; your goal is to accurately represent the property, not create an unrealistic portrayal.
For HDR images, use local adjustments in Lightroom or Photoshop to recover highlights and shadows only where needed, leaving correctly exposed areas untouched. This approach preserves natural-looking colors and details throughout the image. If you’re a Mac user, understanding purgeable space on Mac can help you free up disk space efficiently, ensuring your editing software runs smoothly during post-processing.
Key editing adjustments include:
- Straightening vertical lines to ensure walls appear truly vertical
- Adjusting exposure for even lighting throughout
- Correcting color casts from mixed lighting sources
- Removing minor distractions (but never altering the property’s actual features)
- Sharpening for clarity without overdoing it
Composition and Framing Best Practices
The best height to take photographs is typically chest level, or at a height that best suits the room’s contents. The goal is to fill the photograph with balanced proportions of floor and ceiling as well as the room’s contents, avoiding dead space.
Frame shots to highlight the room’s best features and flow. Include doorways and sight lines to adjacent rooms when possible, as this creates a sense of spaciousness and helps buyers understand the home’s layout.
Additional Tips for Success
Be Consistent: Use the same lighting technique and approach for every room in the property. If you start with natural light, continue with natural light throughout. This creates a cohesive gallery that’s more pleasing to view.
Scout the Property: Take a tour before the shoot to determine which lighting technique will be most appropriate for each space and identify potential challenges.
Shoot During Optimal Times: Schedule shoots when the property shows its best. For exterior shots, golden hour provides magical light. For interiors, midday often provides the most even natural light.
Capture Unique Features: Don’t forget to photograph special selling points like upgraded landscaping, custom built-ins, or architectural details that make the property stand out.
Consider Curb Appeal: The exterior shot is your first impression. Ensure the lawn is mowed, walkways are clear, and fence line plantings are well-maintained for maximum impact.
Common Mistakes to Avoid
- Over-processing HDR images: This creates an artificial, cartoonish look that detracts from the property’s natural beauty
- Using extreme wide-angle lenses excessively: This can distort room proportions and disappoint buyers during in-person viewings
- Neglecting vertical alignment: Leaning walls look unprofessional and distract from the property
- Inconsistent lighting approaches: Mixing techniques creates a disjointed viewing experience
- Poor color accuracy: Mixed lighting sources can create unpleasant color casts if not properly balanced
Legal and Copyright Considerations
If you hire a professional photographer, ensure you understand the copyright terms for your listing photos. According to NAR guidance on photography, find a photographer who offers unrestricted permission for use of listing and marketing photos, as images are often syndicated to multiple real estate websites and listing aggregators.
Bottom Line
Mastering the art of real estate photography is essential for agents and homeowners to make a lasting impression on potential buyers. By following these comprehensive tips (from selecting the right equipment and mastering lighting techniques to proper staging and post-processing) you can elevate the quality of your listing photos and effectively showcase each property’s unique features.
Remember, quality photography is an investment that pays dividends through faster sales, higher prices, and stronger market positioning. Whether you’re a seasoned professional or just starting out, continuous practice and attention to detail will help you capture images that truly sell.
For homeowners considering selling, understanding what year your house was built and its unique characteristics can help you highlight the right features in your photography. And if you’re dealing with a challenging property type, like a split-level home, exceptional photography becomes even more critical in overcoming buyer hesitations.
Ready to showcase your property at its best? Start implementing these professional photography techniques today, or connect with experienced photographers who understand the nuances of real estate marketing. The right images can make all the difference in your property’s success.
For more insights on maximizing your home’s value and appeal, explore our comprehensive guides on home renovation costs, staging strategies, and real estate trends.
