Tips on Carefully Insulating an Old Home
Updated Fri, Jul 18, 2025 - 5 min read
Top blog articles
Old homes come with a charm that newer homes just don’t seem to have. Unfortunately, maintaining that charm can get difficult. A lot of older homes, especially homes built before the 1960s, often do not have effective insulation. This makes the winter months painful to get through. However, if you’re a homeowner looking at insulating your old home, not damaging your property, or affecting its natural ventilation in the process ought to be on top of your priority list. Here are some handy tips on carefully insulating an old home to help you get the job done efficiently.
1. Check for existing insulation
Old houses can get pretty drafty. For example, chimneys and fireplaces without dampers are prime suspects in letting in cold air. But before you start hiring professionals to insulate your home, check if your home already has some insulation in place.
How can you tell? It’s pretty simple. If your exterior walls have a series of patched holes, that’s a telltale sign that you have blow insulation on those walls. If you see exposed fiberglass batts or loose-fill between the ceiling joists in your attic, it means your attic has some insulation as well.
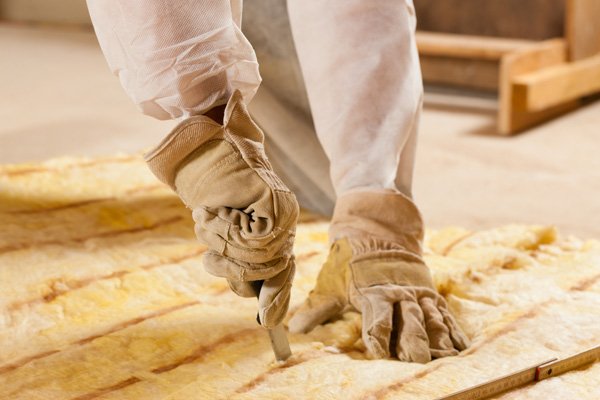
Check and make sure your existing insulation is in good shape and doesn’t have any mildew, mold, or dampness before you add insulation to the home. Dispose of the old insulation if you spot any of these signs of decay and damage to avoid serious health hazards.
However, if your home hasn’t been insulated, here’s how you ought to go about it.
2. Start from the top
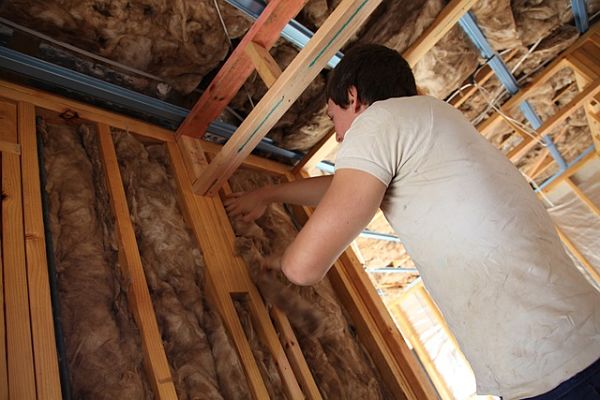
Most of a home’s heat loss happens from a poorly insulated roof and attic. So that’s where you ought to begin your home insulation project, right from the top. This is a sure-shot way of retaining heat during the winter months while being energy efficient.
The first step is for you to figure out where the air gaps are. Places you need to look at include windows, vents, chimneys, gaps around lighting fixtures and ceiling fans, ductwork, and exhaust fans. Once you’ve identified the leaks, air seal those gaps using either caulk, weatherstripping, or even a foam sealant.
Next, begin the process of insulating the attic. Use batt insulation for the spaces between the roof and the rafters. Your attic flooring can be insulated using batt insulation or loose fill.
If you’re installing batt insulation with vapor barriers on them, make sure the barrier is facing the warm side up if you live in warmer climates and the other way around if you live in colder climates.
If your budget permits it, consider replacing your roof with metal roofing. Metal roofs are energy-efficient, lightweight, and durable.
Read more: Ceiling crack repair: Most common causes and their solutions
3. Head down below
The next part of the house you want to tackle is the bottom-most part of the house, your basements, and crawl spaces.
As with your roof and attic, figure out where your air gaps are by checking your basement windows, ducts, electrical wiring harnesses, and pipes. Seal all of those up. If your egress windows do not already have well covers, add them now and install vapor or moisture barriers.
Make sure your crawl space entry points are adequately protected to avoid rodent infestations.
Adding a layer of waterproof sealing compound to your basement walls and floors would also be a great idea.
For an extra layer of protection, insulate your floor joists with batt insulation.
4. Tackle the walls next
Wall insulation for old homes is a lot more difficult than insulating the walls of a newer house. In newer homes, you can drill holes in the wall, blow-in cellulose insulation through the wall cavities, and seal the walls. If you used that approach on old homes, you risk condensation forming in between the walls. This could lead to moisture building up and mold, wood rot, and foggy windows.
Your ideal approach would be to start with adding insulation to the exterior walls. Begin the process by applying a vapor barrier to the exterior walls. Next, attach foam board insulation to the walls, ideally around one inch. Cover then with wood siding.
If you do have no choice but to blow in insulation, then begin by removing the weather barrier and cladding before you drill holes in the wall. Add a water-resistant flashing before blowing in loose foam insulation. Make sure the drill holes are sealed shut once you’re done.
Read more: Old house plumbing
5. A few extras
Just insulating the walls, roof and basement may not be enough to keep you warm in your old home. Here are a few extra tips to make sure you stay warm and toasty this winter.
A lot of old homes tend to be large, spacious, and airy. Having a healthy HVAC system is of utmost importance to keeping the house warm. A faulty furnace will not be able to keep your home warm, and getting repairs or maintenance done during peak winters can be difficult. So get your HVAC inspected and if required, repaired before winter sets in. After all, there’s only so much a sweater and scarf can do to protect you from the elements.
If your home has single-paned windows, swap them out for new energy-efficient windows before it’s too late.
And finally, hire professionals to help you with your insulation project. Old homes can be complicated. For example, houses built before 1978 often used lethal lead-based paints, the removal of which needs professional attention. You don’t want to end up damaging your walls either. So it’s best you let someone with the experience and expertise of renovating old homes handle adding new insulation to your home.
Read more: ISO construction types
Written by Narayan Shrouthy. January 27, 2021
Narayan is a content writer for Kukun. With experience in both content writing and editing, Narayan mixes his writing and love for reading with his passion for music. As an active musician, He aims to be a key player in Kukun's content experience.
Top blog posts


See more >
Recommended
Join our newsletter
Get helpful renovation tips, insightful home maintenance articles, real estate market trends, and more.
Please enter a name
Please enter a valid e-mail